Learn how to create a custom WordPress layout block to display WebGL shaders.
Configure the Environment
Following the official WordPress Guide, the first step is to install nvm and use that to install nodejs and npm:
curl -o- https://raw.githubusercontent.com/nvm-sh/nvm/v0.38.0/install.sh | bashThen restart your terminal and install the latest version of nodejs with:
nvm install nodeYou should now have nodejs and npm installed, and you can verify this with:
node --versionMake a new directory and cd into it, then run npx to create the plugin template. It will prompt you for a few details, then install all the required scripts.
mkdir my-plugin
cd my-plugin
npx @wordpress/create-block
Move your plugin so it sits under wp-content/plugins. Finally, run
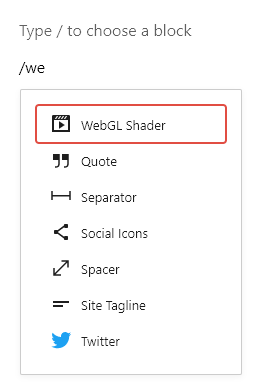
npm startThis will start watching your files for changes. You can now go to your WordPress website and click on “Plugins” in the left hand menu – your new plugin should show there. Simply press the “Activate” link to enable it.
Anatomy of a Block
The block editor is build on top of the React Javascript framework. Almost all the work of the block is done in Javascript, the PHP file is simply there to load the required Javascript files.
The files created by the wordpress/create-block command are:
block.json: Metadata describing your block.index.js: The main file that ties together the edit and save files.edit.js: How the block should appear in the page editor.save.js: How the block should appear when rendered on the site.style.scss: CSS styles applied both in the editor and on the site.editor.scss: CSS styles applied only in the editor.
Javascript files are written using JSX, which mixes HTML directly into the javascript code.
Creating the Block
User-editable data is attached to blocks using “attributes”. The block only needs a single attribute: the source code for the shader. To create this, we edit block.json and add a sourceCode string attribute of type string:
"attributes": {
	"sourceCode": {
		"type": "string"
	}
}
Modify edit.js to import the TextareaControl and use it for editing the shader’s source code. We set up attributes on the <TextareaControl> for the label, the value, and a change event handler to save the new value.
/**
 * Retrieves the translation of text.
 *
 * @see https://developer.wordpress.org/block-editor/packages/packages-i18n/
 */
import { __ } from '@wordpress/i18n';
import { TextareaControl } from '@wordpress/components';

/**
 * React hook that is used to mark the block wrapper element.
 * It provides all the necessary props like the class name.
 *
 * @see https://developer.wordpress.org/block-editor/packages/packages-block-editor/#useBlockProps
 */
import { useBlockProps } from '@wordpress/block-editor';

/**
 * Lets webpack process CSS, SASS or SCSS files referenced in JavaScript files.
 * Those files can contain any CSS code that gets applied to the editor.
 *
 * @see https://www.npmjs.com/package/@wordpress/scripts#using-css
 */
import './editor.scss';
import { parseWithAttributeSchema } from '@wordpress/blocks';

/**
 * The edit function describes the structure of your block in the context of the
 * editor. This represents what the editor will render when the block is used.
 *
 * @see https://developer.wordpress.org/block-editor/developers/block-api/block-edit-save/#edit
 *
 * @return {WPElement} Element to render.
 */
export default function Edit({ attributes, setAttributes }) {
	return (
		<div {...useBlockProps()}>
			<TextareaControl
				label={ __('WebGL Shader Source Code', 'webgl-shader') }
				value={ attributes.sourceCode }
				onChange={(val) => setAttributes({ sourceCode: val })}
			/>
		</div>
	);
}
Edit save.js to build the output HTML. In this case we build the source code for the vertex and fragment shaders, then create a <script> tag to compile and output them by calling the function webglShader(), which will be defined later.
/**
 * Retrieves the translation of text.
 *
 * @see https://developer.wordpress.org/block-editor/packages/packages-i18n/
 */
import { __ } from '@wordpress/i18n';

/**
 * React hook that is used to mark the block wrapper element.
 * It provides all the necessary props like the class name.
 *
 * @see https://developer.wordpress.org/block-editor/packages/packages-block-editor/#useBlockProps
 */
import { useBlockProps } from '@wordpress/block-editor';
import { parseWithAttributeSchema } from '@wordpress/blocks';

/**
 * The save function defines the way in which the different attributes should
 * be combined into the final markup, which is then serialized by the block
 * editor into `post_content`.
 *
 * @see https://developer.wordpress.org/block-editor/developers/block-api/block-edit-save/#save
 *
 * @return {WPElement} Element to render.
 */
export default function save({ attributes }) {
	const script = `const vertexShaderSource = \`#version 300 es
            in vec4 vertex;
            in vec2 uv;

            uniform mat4 modelView;
            uniform mat4 projection;

            out vec2 vUv;
            out vec4 vSurface;

            void main()
            {
                gl_Position = projection * modelView * vertex;
                gl_PointSize = 2.0;
                vUv = uv;
                vSurface = vertex;
            }\`;

		const fragmentShaderSource = \`#version 300 es
				precision mediump float;

				in vec2 vUv;
				out vec4 fragColor;

				uniform float iTime;\`
			+ ${JSON.stringify(attributes.sourceCode)};
			webglShader(vertexShaderSource, fragmentShaderSource);`;

	return (
		<script {...useBlockProps.save()} type="text/javascript" dangerouslySetInnerHTML={{ __html: script }}>
		</script>
	);
}
Styling the Block
When you add your block in the page editor it will have a blue background with a red border – this doesn’t indicate an error! This is just the default styling. Edit the files style.scss and editor.scss to set the appearance. I chose a border of #ddd with a four pixel radius, to match the Code block type.
.wp-block-zebra-north-webgl-shader {
	color: #fff;
	padding: 2px;
}

.wp-block-zebra-north-webgl-shader textarea {
	font-family: 'Courier New', Courier, monospace;
	border: 1px solid #ddd;
	border-radius: 4px;
}
The Front End
At this point we have an editable block on the back end that outputs a <script> tag on the front end, which calls the webglShader() function.
We’ll add two new files:
webgl-shader.js: Output the shader.gl-matrix.js: Supporting matrix maths functions, by Brandon Jones and Colin MacKenzie IV.
glMatrix is a very useful high performance matrix maths library, available under GPL from https://glmatrix.net/.
Loading Javascript Files
To load the supporting Javascript files, modify the plugin’s PHP source code in webgl-shader.php so that the scripts are enqueued in response to the wp_enqueue_scripts event.
<?php
function zebra_north_webgl_shader_block_init() {
	register_block_type( __DIR__ );
}

function zebra_north_webgl_shader_enqueue_scripts() {
	wp_enqueue_script('zebra_north_gl_matrix', plugin_dir_url(__FILE__) . '/gl-matrix.js');
	wp_enqueue_script('zebra_north_webgl_shader', plugin_dir_url(__FILE__) . '/webgl-shader.js');
}

add_action( 'init', 'zebra_north_webgl_shader_block_init' );
add_action('wp_enqueue_scripts', 'zebra_north_webgl_shader_enqueue_scripts' );
Finally, the script to compile and render the shader. I’ll break this down by part.
Creating the Shader HTML
'use strict';

/**
 * WebGL Shader WordPress Block v1.0.0.
 *
 * Copyright (c) Zebra North, 2021
 */

/**
 * Create a <canvas> element and display a shader in it.
 *
 * @param {String} fragmentShaderSource The source code for the fragment shader.
 */
function webglShader(fragmentShaderSource)
{
    // This is used to assign each shader on the page a unique ID.
    let id = 1;

    // [FUNCTIONS GO HERE]

    // Create a <canvas> element on which to draw the shader.
    const canvasId = 'webgl-shader-' + id++;
    document.write('<canvas id="' + canvasId + '" class="zebra-north-webgl-shader" width="640" height="360"></canvas>')

    // Initialise the shader when the page has finished loading.
    window.addEventListener('DOMContentLoaded', () => main(canvasId, getVertexShaderSource(), getFragmentShaderSource(fragmentShaderSource)));
}
Beginning the file with 'use strict' sets the Javascript interpreter into strict mode, which gives you a little more error checking and hence safety when developing.
All the internal functions are declared within the webglShader() function so that they do not pollute the global namespace.
When the webglShader() function is called, it creates a unique ID and outputs a <canvas> tag. This is the canvas onto which the shader will be drawn. It then waits for the remainder of the DOM content to be loaded before initialising the shader.
Creating the WebGL Context
All WebGL functions require a “WebGL context” to work with. The context stores the state of WebGL, for example the contents of the vertex buffers and the current projection matrix. A WebGL context is created by calling getContext() on the canvas element.
/**
 * Create a WebGL2 rendering context on the given canvas.
 *
 * @param {DOMElement} canvas The <canvas> element.
 *
 * @returns {WebGL2RenderingContext} Returns the rendering context.
 *
 * @throws {Error} Thrown if the canvas element does not exist or WebGL2 is not supported.
 */
const createContext = function (canvas)
{
    if (!canvas)
        throw new Error('Could not find canvas element');

    const context = canvas.getContext('webgl2');

    if (!context)
        throw new Error('Failed to get webgl context, webgl is not supported by the browser');

    return context;
};
The Vertex Shader Source
The vertex shader is very simple, it just multiplies the object space vertices by the modelView and projection matrices. It also multiplies the texture UVs by the resolution (the pixel size of the canvas element) for compatibility with Shadertoy.
/**
 * Get the source code for the vertex shader.
 * This multiplies the UVs by iResolution for compatibility
 * with Shadertoy.
 *
 * @returns {String} Returns shader source.
 */
const getVertexShaderSource = function ()
{
    return `#version 300 es
        precision mediump float;
        in vec4 vertex;
        in vec2 uv;

        uniform mat4 modelView;
        uniform mat4 projection;
        uniform vec2 iResolution;

        out vec2 vUv;
        out vec4 vSurface;

        void main()
        {
            gl_Position = projection * modelView * vertex;
            gl_PointSize = 2.0;
            vUv = uv * iResolution;
            vSurface = vertex;
        }`;
}
The Fragment Shader Source
The fragment shader from the block input requires some boilerplate adding, to set up the shader inputs and outputs. This function wraps the boilerplate around the block input.
/**
 * Get the source code for the fragment shader.
 * This takes the source code from the input block and adds
 * the necessary boilerplate around it.
 *
 * @param {String} source The source code from the input block.
 *
 * @returns {String} Returns shader source.
 */
const getFragmentShaderSource = function (source)
{
    return `#version 300 es
        precision mediump float;

        in vec2 vUv;
        out vec4 fragColor;

        uniform float iTime;
        uniform vec2 iResolution;

        ` + source + `

        void main()
        {
            vec4 colour = vec4(1.0, 0.0, 0.0, 1.0);
            mainImage(colour, vUv);
            fragColor = colour;
        }`;
};
Compiling a Shader
With the source code now available for both the vertex and fragment shader, its time to compile them. This is straightforward, just call createShader() to create the shader object, shaderSource() to load in the source code, then compileShader() to compile it.
/**
 * Build a compiled shader from source code.
 *
 * @param {WebGL2RenderingContext} gl   The WebGL context.
 * @param {Number}                 type The type of shader, either gl.VERTEX_SHADER or gl.FRAGMENT_SHADER.
 * @param {String}                 id   The ID attribute of the <script> element containing the shader's source code.
 *
 * @returns {WebGLShader} Returns the shader.
 *
 * @throws {Error} Thrown if compilation fails, eg due to a syntax error in the source code.
 */
const createShader = function (gl, type, source)
{
    const shader = gl.createShader(type);

    gl.shaderSource(shader, source);
    gl.compileShader(shader);

    if (!gl.getShaderParameter(shader, gl.COMPILE_STATUS))
    {
        const msg = 'Failed to compile shader ' + id + ': ' + gl.getShaderInfoLog(shader);

        gl.deleteShader(shader);

        throw new Error(msg);
    }

    return shader;
};
Linking a Program
Once the shaders have been compiled, they are linked together into a single program:
/**
 * Link shaders together into a program.
 *
 * @param {WebGL2RenderingContext} gl      The WebGL context.
 * @param {Array}                  shaders An array of WebGLShader.
 *
 * @returns {WebGLProgram} Returns a set of linked shaders.
 *
 * @throws {Error} Thrown if linking fails.
 */
const createProgram = function (gl, shaders)
{
    const program = gl.createProgram();

    for (const shader of shaders)
        gl.attachShader(program, shader);

    gl.linkProgram(program);

    if (!gl.getProgramParameter(program, gl.LINK_STATUS))
    {
        const msg = 'Failed to create GL program: ' + gl.getProgramInfoLog(program);

        gl.deleteProgram(program);

        throw new Error(msg);
    }

    return program;
};
Putting It All Together
The main function sets up WebGL, creates the geometry for the scene, copies the geometry data into WebGL’s internal buffers, and creates a timer that is called each frame.
/**
 * Run the shader.
 *
 * @param {String} canvasId             The ID attribute of the <canvas> tag that will display the shader.
 * @param {String} vertexShaderSource   The source code for the vertex shader.
 * @param {String} fragmentShaderSource The source code for the fragment shader.
 */
function main(canvasId, vertexShaderSource, fragmentShaderSource)
{
    const glCanvas = document.getElementById(canvasId);
    const gl = createContext(glCanvas);

    const vertexShader = createShader(gl, gl.VERTEX_SHADER, vertexShaderSource);
    const fragmentShader = createShader(gl, gl.FRAGMENT_SHADER, fragmentShaderSource);

    const program = createProgram(gl, [vertexShader, fragmentShader]);

    const scene = {
        shader: {
            program: program,
            uniforms: {
                projection: gl.getUniformLocation(program, 'projection'),
                modelView: gl.getUniformLocation(program, 'modelView'),
                time: gl.getUniformLocation(program, 'iTime'),
                resolution: gl.getUniformLocation(program, 'iResolution'),
            },
            attributes: {
                vertex: gl.getAttribLocation(program, 'vertex'),
                uv: gl.getAttribLocation(program, 'uv'),
            },
        },
        buffers: {
            vertex: gl.createBuffer(),
            uv: gl.createBuffer(),
            index: gl.createBuffer(),
        },
        geometry: {
            vertices: [],
            uvs: [],
            indices: [],
        }
    }

    // Create a mesh containing a single quad in the XY plane.
    scene.geometry.vertices.push(0, 0, 1);
    scene.geometry.vertices.push(0, 1, 1);
    scene.geometry.vertices.push(-1, 0, 1);
    scene.geometry.vertices.push(-1, 1, 1);

    scene.geometry.uvs.push(0, 0);
    scene.geometry.uvs.push(0, 1);
    scene.geometry.uvs.push(1, 0);
    scene.geometry.uvs.push(1, 1);

    scene.geometry.indices.push(0);
    scene.geometry.indices.push(1);
    scene.geometry.indices.push(2);
    scene.geometry.indices.push(3);

    // Load the geometry into the WebGL buffers.
    gl.bindBuffer(gl.ARRAY_BUFFER, scene.buffers.vertex);
    gl.bufferData(gl.ARRAY_BUFFER, new Float32Array(scene.geometry.vertices), gl.STATIC_DRAW);

    gl.bindBuffer(gl.ARRAY_BUFFER, scene.buffers.uv);
    gl.bufferData(gl.ARRAY_BUFFER, new Float32Array(scene.geometry.uvs), gl.STATIC_DRAW);

    gl.bindBuffer(gl.ELEMENT_ARRAY_BUFFER, scene.buffers.index);
    gl.bufferData(gl.ELEMENT_ARRAY_BUFFER, new Uint16Array(scene.geometry.indices), gl.STATIC_DRAW);

    // Draw the frame.
    window.setInterval(() => draw(gl, glCanvas, scene), 16.66);
}
Drawing a Frame
Finally, the draw() function renders a single frame. The camera is configured, the shader inputs are updated, and then final the single quad is drawn. The fragment shader is drawn as the texture of this quad.
/**
 * Render the scene for a single frame.
 *
 * @param {WebGL2RenderingContext} gl     The WebGL2 render context.
 * @param {Canvas}                 canvas The <canvas> DOM element to which the scene is rendered.
 * @param {Scene}                  scene  The scene to draw.
 */
const draw = function (gl, canvas, scene)
{
    // Clear the screen.
    gl.clearColor(0.0, 0.0, 0.0, 1.0);
    gl.disable(gl.DEPTH_TEST);
    gl.clear(gl.COLOR_BUFFER_BIT | gl.DEPTH_BUFFER_BIT);

    // Set up an orthographic camera.
    const projectionMatrix = glMatrix.mat4.create();
    glMatrix.mat4.ortho(projectionMatrix, 0, 1, 0, 1, 0.01, 200.0);

    let modelView = glMatrix.mat4.create();
    glMatrix.mat4.translate(modelView, modelView, [1, 0, 0]);
    let target = glMatrix.vec3.create();
    let up = glMatrix.vec3.create();
    up[1] = 1;
    glMatrix.mat4.lookAt(modelView, [0, 0, -1], target, up);

    gl.useProgram(scene.shader.program);

    // Set the shader program uniforms: the projection matrix, modelview matrix, time, and resolution.
    gl.uniformMatrix4fv(scene.shader.uniforms.projection, false, projectionMatrix);
    gl.uniformMatrix4fv(scene.shader.uniforms.modelView, false, modelView);
    gl.uniform1f(scene.shader.uniforms.time, (Date.now() % 100000) / 1000);
    gl.uniform2f(scene.shader.uniforms.resolution, canvas.clientWidth, canvas.clientHeight);

    // Load the quad.
    gl.enableVertexAttribArray(scene.shader.attributes.vertex);
    gl.bindBuffer(gl.ARRAY_BUFFER, scene.buffers.vertex);
    gl.vertexAttribPointer(scene.shader.attributes.vertex, 3, gl.FLOAT, false, 0, 0);

    gl.enableVertexAttribArray(scene.shader.attributes.uv);
    gl.bindBuffer(gl.ARRAY_BUFFER, scene.buffers.uv);
    gl.vertexAttribPointer(scene.shader.attributes.uv, 2, gl.FLOAT, false, 0, 0);

    gl.bindBuffer(gl.ELEMENT_ARRAY_BUFFER, scene.buffers.index);

    // Draw the quad.
    gl.drawElements(gl.TRIANGLE_STRIP, 4, gl.UNSIGNED_SHORT, 0);
};
Conclusion
Hopefully this has given you some insight into both WordPress’ block API, and WebGL.
This plugin is available for download on my GitHub page: https://github.com/ZebraNorth/webgl-shader